c. Create EC2 pem key pair, IAM roles and Cloud9 Console
In this step, you create the EC2 pem key along with the IAM profiles needed for the AWS Batch.
Create EC2 Pem Key Pair
You can reuse your pem key if you already have one and do not have to create a new one.
The PEM key is essential for the users to ssh into their instance post their creation to monitor or troubleshoot issues in the nodes. Create a KeyPair documents the steps to create a keypair.
You can reuse your pem key if you already have one and do not have to create a new one.
Create the AWSBatchServiceRole, Instance and ECSTaskExecution Roles
The AWS Batch compute environment and container instance roles are automatically created for you in the console first-run experience, so if you intend to use the AWS Batch console, you can move ahead to the next section. If you plan to use the AWS CLI instead, complete the procedures in
- AWS Batch service for the Batch service to launch instances into the compute environment, setup auto scaling groups etc.
- AWS Instance Role for the instance to make calls to several AWS API’s on your behalf.
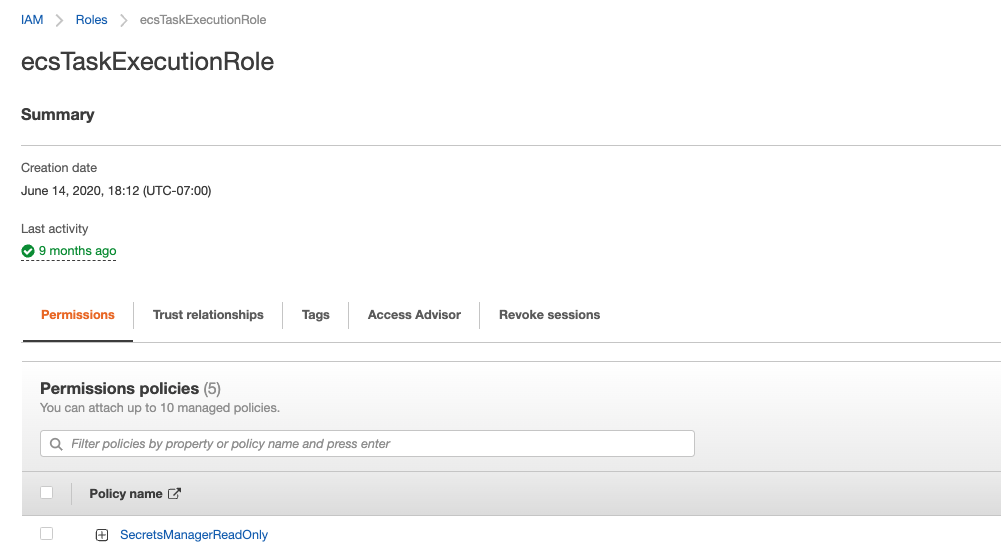
- AWS ECS Task Execution Role for the task to make calls to several AWS API’s on your behalf
Access to additional services from ECS Task.
For security, we use secrets manager to inject ssh keys into the container during runtime instead of packaging it into to build process. Therefore, ecsTaskExecution role should have access to the secretsmanager.

Additionally, if your container requires access to other AWS Services (DynamoDB, S3, RDS etc..) - it can be added to the Role
Create Cloud9 Console
In order to get an environment where you can build containers, we need a Cloud9 IDE. Since we are using the Cloud9 to build/push containers and log into our cluster, we need to select the reasonably sized instance located in an appropriate subnet.
At a high level,
-
Create a new Cloud9 Instance and select a c5.2xlarge as the instance
-
Launch it in the VPC and Public Subnet you created in the previous step The steps to create the Cloud9 instance is detailed in Cloud9 Creation
-
The default Storage attached to Cloud9 (10 GB) is not sufficient to build the containers. Each of the DL containers are atleast 10 - 20GB in size and building several containers can easily fillup the space. Therefore, we recommend to increase the root volume to atleast 200 GB. Next, we outline simple steps to increase the size to 200 GB. Follow the steps in Resize EBS to use the script to resize the volume to 200 GB. The script given below automates the sequence of steps to identify the root volume and increase the size
curl -s https://gist.githubusercontent.com/wongcyrus/a4e726b961260395efa7811cab0b4516/raw/6a045f51acb2338bb2149024a28621db2abfcaab/resize.sh | bash /dev/stdin 200
- After increasing the size, check the disk space
$ df -h
Filesystem       Size  Used Avail Use% Mounted on
udev             7.6G     0  7.6G   0% /dev
tmpfs            1.6G  824K  1.6G   1% /run
/dev/nvme0n1p1    97G  8.2G   89G   9% /
tmpfs            7.6G     0  7.6G   0% /dev/shm
tmpfs            5.0M     0  5.0M   0% /run/lock
tmpfs            7.6G     0  7.6G   0% /sys/fs/cgroup
/dev/loop0        56M   56M     0 100% /snap/core18/2538
/dev/loop1        26M   26M     0 100% /snap/amazon-ssm-agent/5656
/dev/loop2        56M   56M     0 100% /snap/core18/2409
/dev/loop3        47M   47M     0 100% /snap/snapd/16292
/dev/nvme0n1p15  105M  4.4M  100M   5% /boot/efi
tmpfs            1.6G     0  1.6G   0% /run/user/1000
~/environment $
- The Cloud9 IDE comes with a default aws cli. However, it is always better to update it to the latest cli. Follow the steps in Update AWS CLI to update the aws cli and run a sample cli to list the ec2 instances and keypairs in your account.