b. Create EFS for Sharing Data
If you already have an EFS that could be mounted within the VPC, you can skip the step and proceed to the next step.
In this step, you create the EFS volume in same zone we created the subnet in the last step.
Note: If you already have an EFS that could be mounted within the VPC, you can skip the step and proceed to the next step.
Create One Zone EFS
-
Select EFS inside your AWS Console login
-
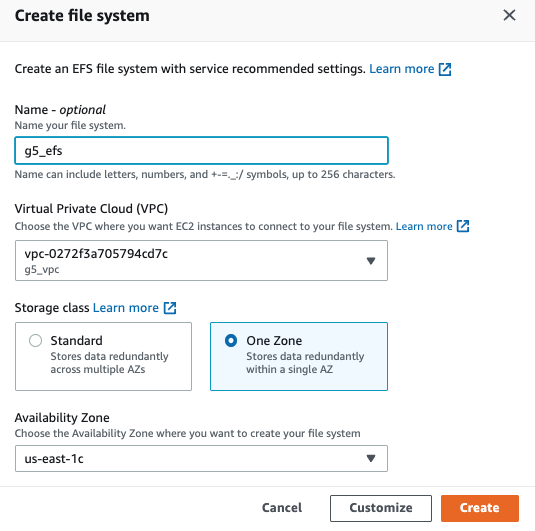
Click on “Create EFS” and set the following options
- Name for the EFS Volume
- Select the VPC from the previous step
- Ensure that you select One Zone EFS. You could also create it in multiple AZ’s if you plan to use training instances in Multiple AZ’s
- Select the appropriate zone
-
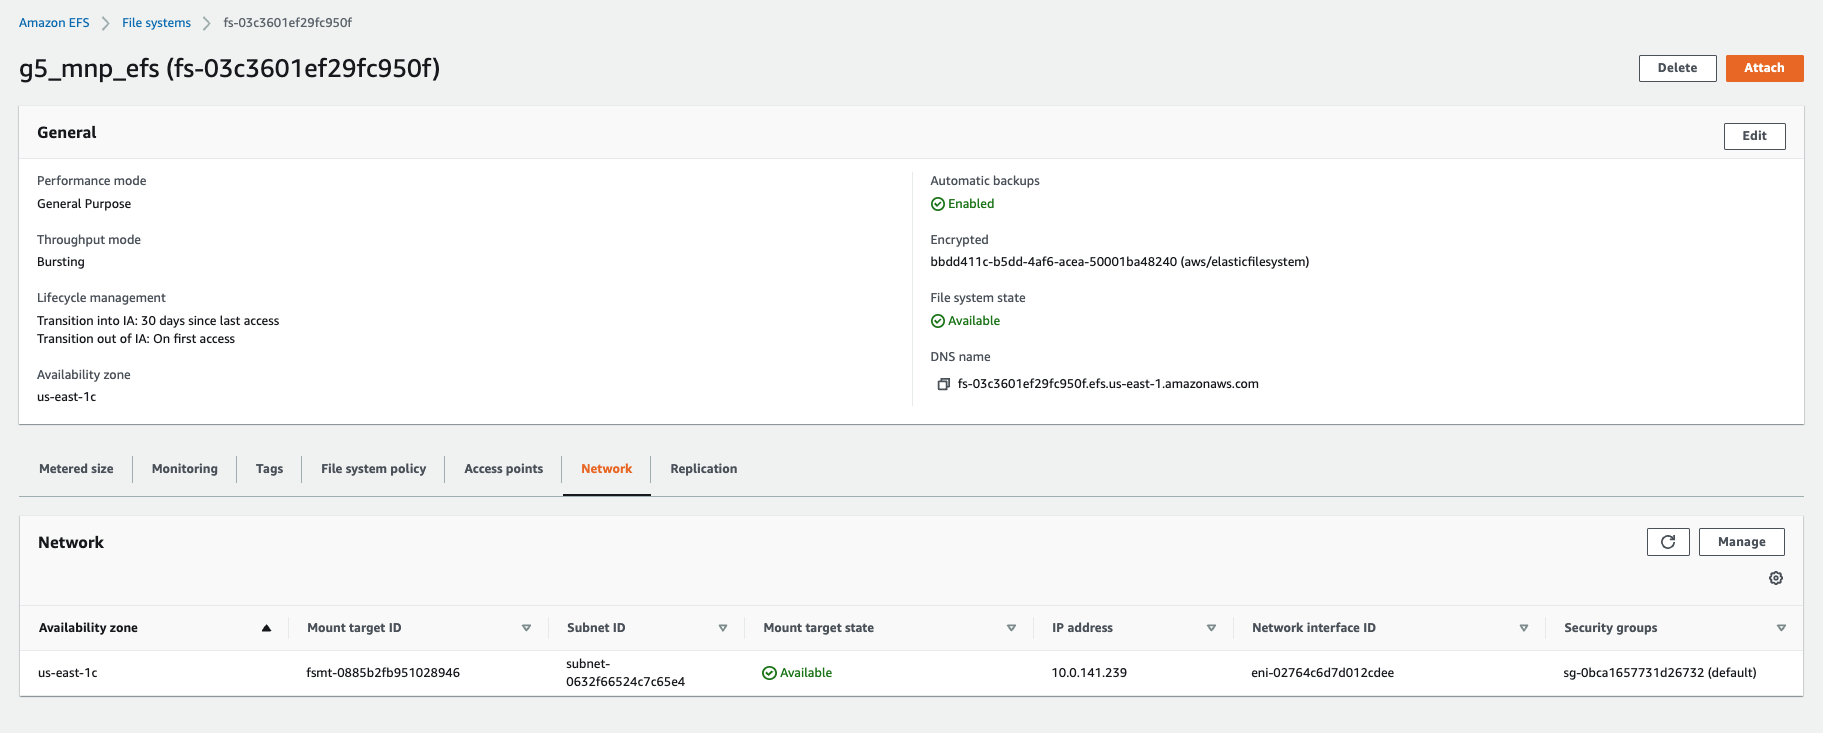
Verify the EFS created and create a security group that is the default for this VPC. Since this is the default security group for the VPC, any instance launched with this security group has the ability to mount the EFS volume.
-
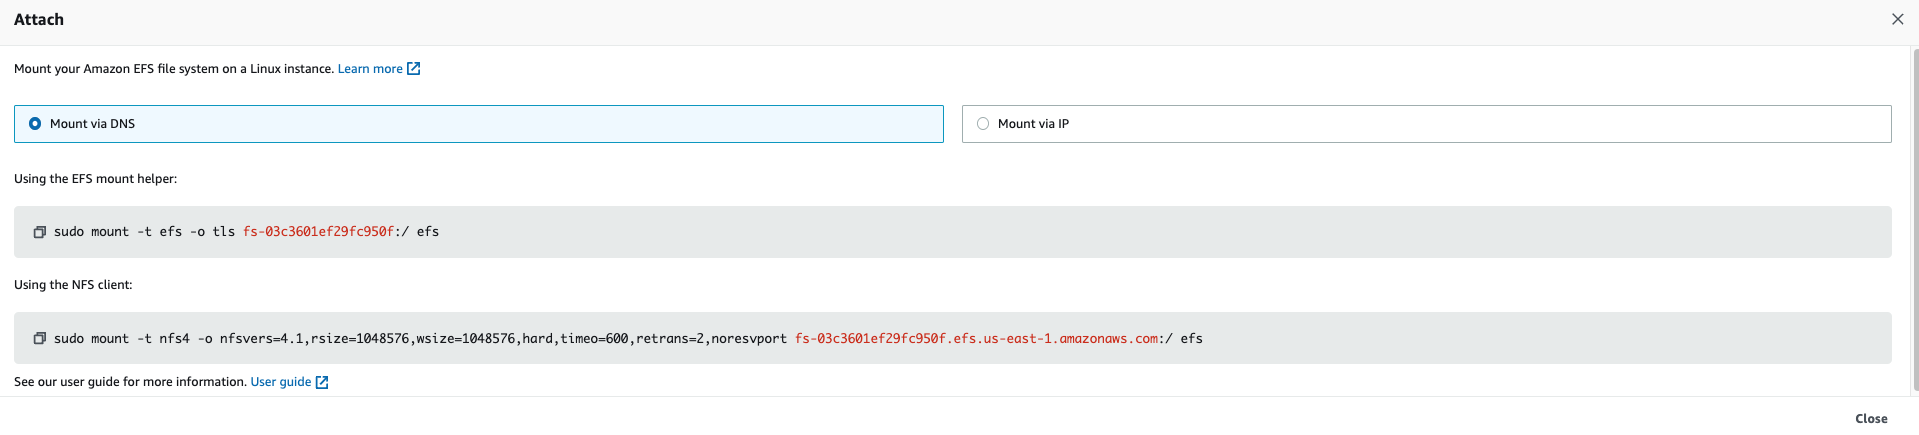
The instructions to attach the EFS is also available in the “Attach Volume”. This would present the instructions for mounting the EFS through both DNS and IP.
-
For the next steps, we use the artifacts created in this step
- VPC & Subnet
- EFS Mount instructions
- Security Groups